


![]()
Modifications and Customisation
By Craig Katen
Performance Enhancements
Without making internal changes to the engine a slight performance improvement can be gained using aftermarket accessories fairly easily. The old trilogy of Air, Fuel and Exhaust is a good starting point and a prerequisite for any substantial changes in the future.
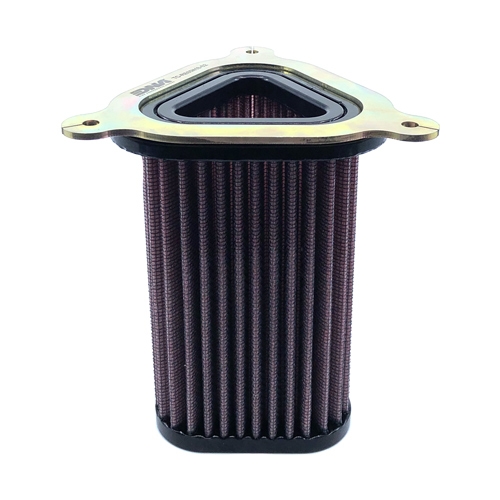
Air Filter
DNA make a washable oiled filter that seems to be the market choice for performance filters with claims of 95% improvement in flow rates. I also installed the stage 2 airbox cover that replaces the stock cover plate which has a 90 degree inlet and is very restrictive.
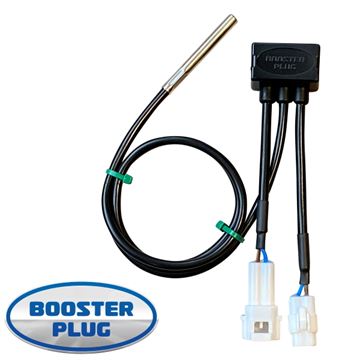
Fuel
Without going to the expense of a fuel computer and dyno tune the easiest way to get some fuel enhancement is to install a Booster Plug which replaces the stock Air Intake Temperature sensor and uses a resistor to trick the system into believing the air temperature is cooler and therefore denser and hence requires more fuel.
Exhaust
The stock mufflers are ginormous and weigh 4.5kgs each. The stainless steel S&S mufflers weigh about 1.5kg and are much slimmer and less restrictive. They can be a bit loud and on a long trip I would recommend installing the DB killers (baffles) that come with them or you may need some earplugs.
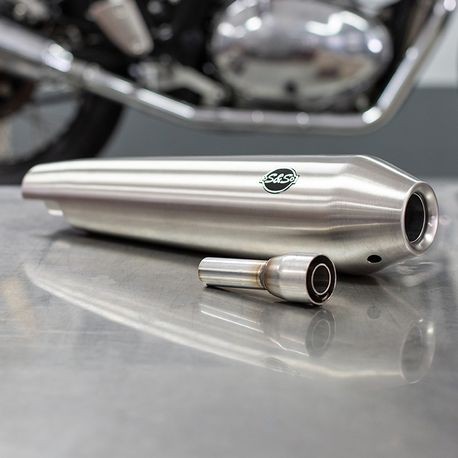
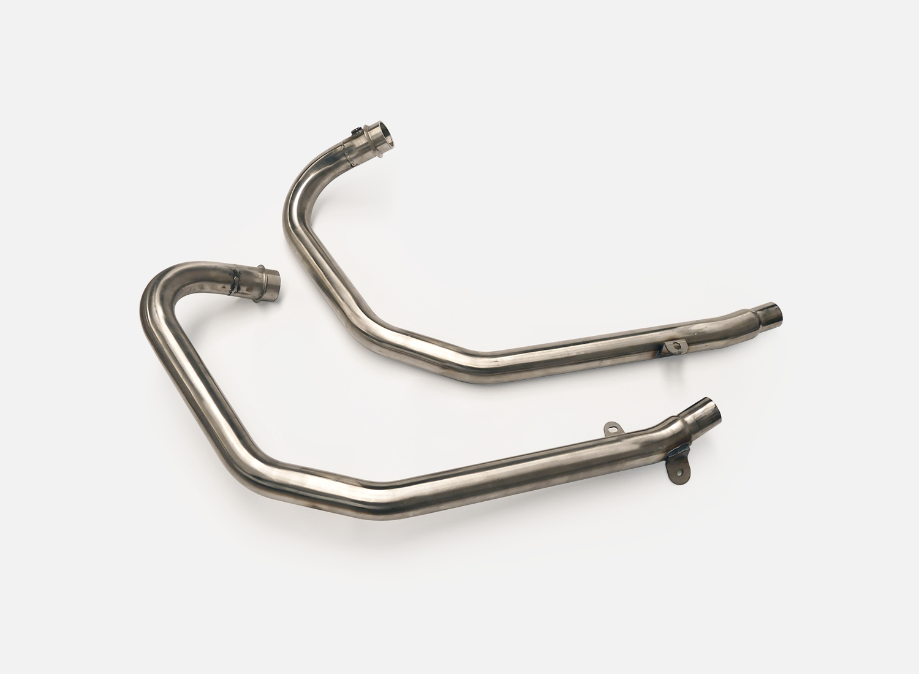
To match the stainless mufflers I installed some TEC Bike Parts big bore stainless headers. The stock headers are chrome and looked out of place with the S&S mufflers and also fairly restrictive being double walled and small diameter. Mufflers alone are said to only provide a couple of percent performance improvement, however when combined with headers it can be much more.
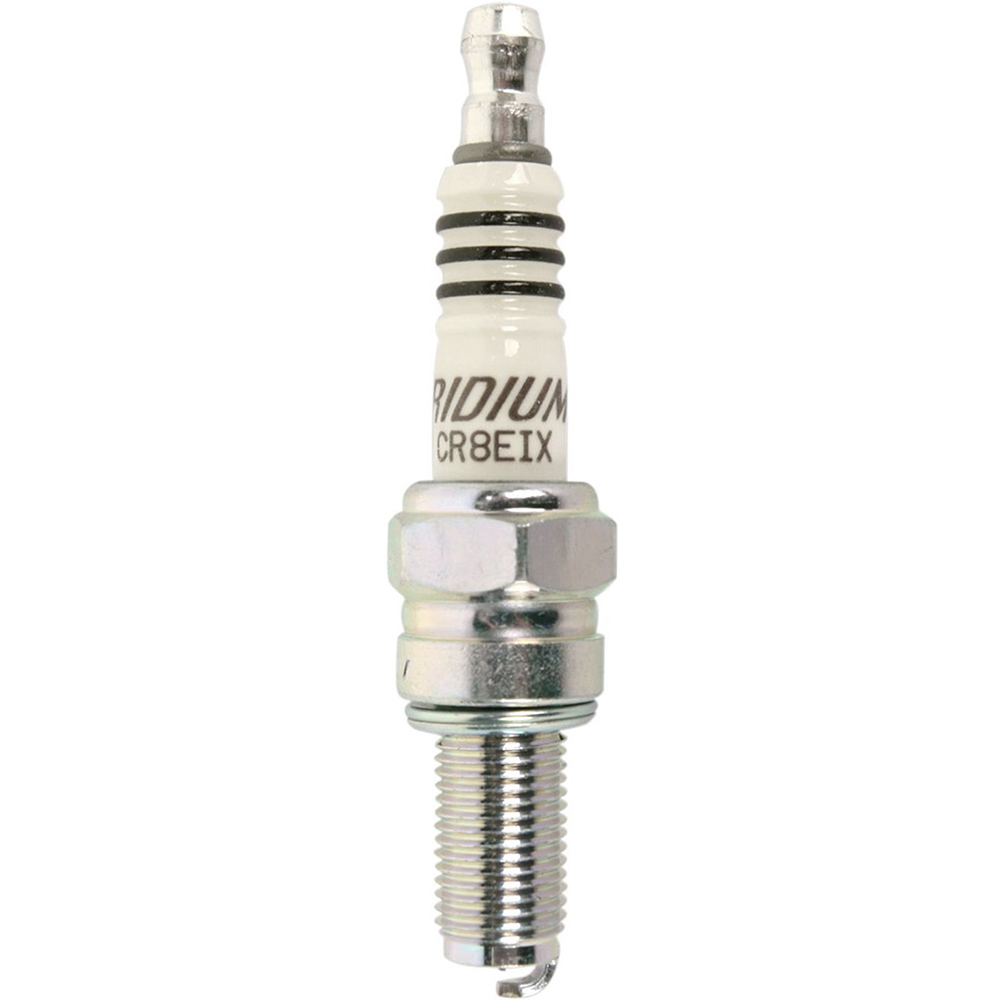
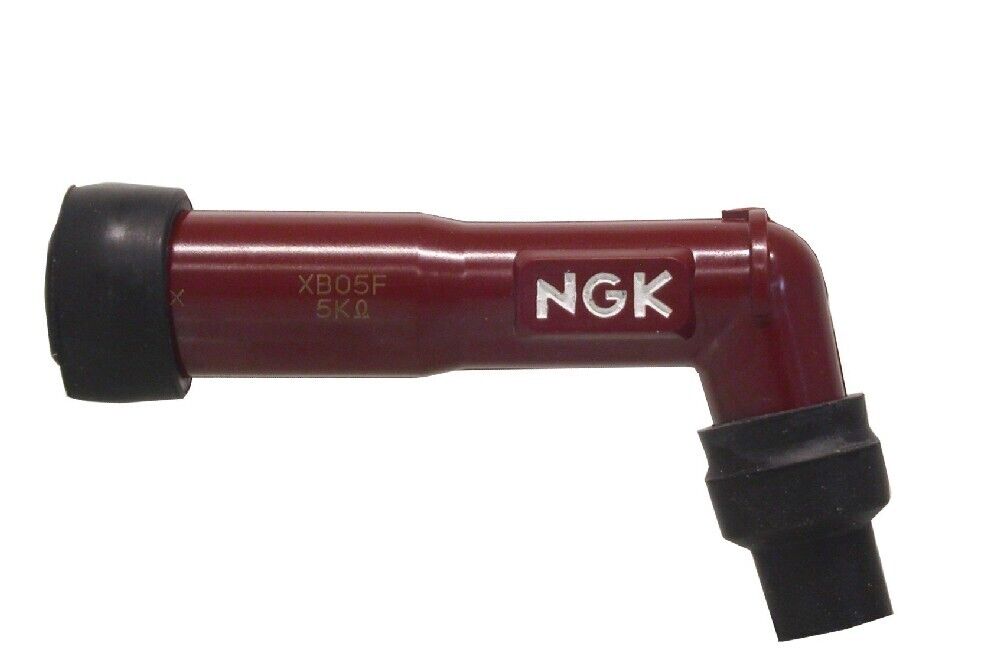
Spark Plugs and Caps
I wanted to upgrade to NGK iridium spark plugs and in the process of researching the correct model for the bike I came across some red NGK Spark Plug Caps. Combined with the Iridium plugs they provide better noise suppression, performance and reliability.
Suspension Upgrades
The suspension components on a relatively cheap motorcycle are usually the cheapest no-name parts available. Considering the vast array of options and the ease of upgrading, there are many choices for aftermarket suspension enhancements.
Some owners will only ride on city streets and some will only ride on smooth highways and others like us in Australia have to put up with Third-World road conditions as soon as you venture away from residential areas, even on our major highways.
For me, doing lots of country miles, the suspension was inadequate. The forks became very choppy at high speed on rough roads and over bumps the shocks seem to bottom out on the spring with no feel of damping before that.
I had already upgraded my Himalayan’s suspension using YSS components so I followed suit with the Interceptor.
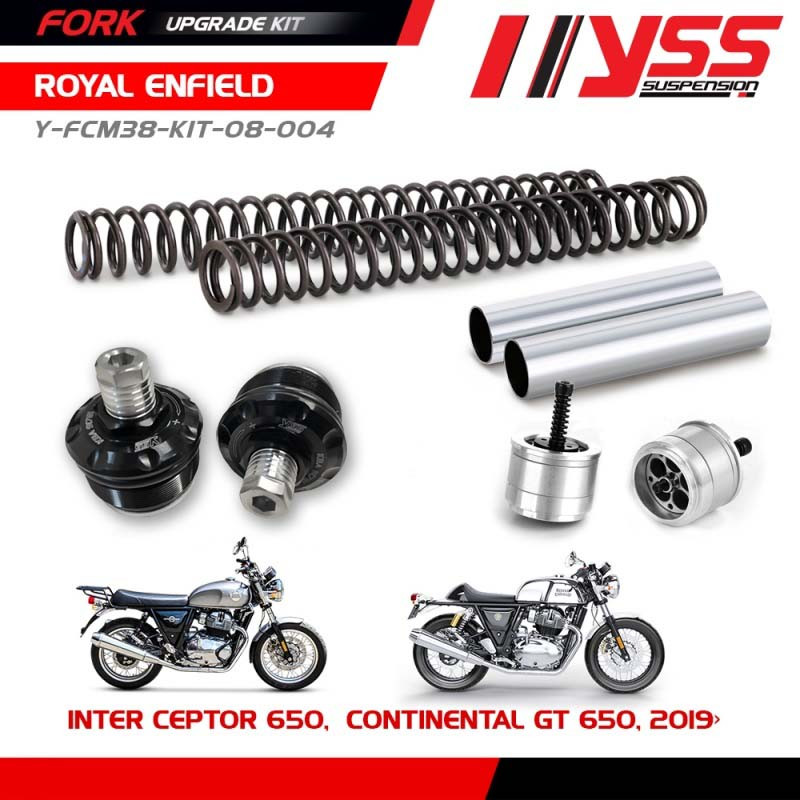
Forks
The YSS fork upgrade kit consists of a pair of new springs ( the stock ones seem to have very tight coils at one end that seem to bind up as do the shock springs) a set of PD (progressive damping) Valves and a set of preload adjustable fork caps. Specifications are also supplied for fork oil weight and volume which vary from the stock settings.
Installation is fairly complex but achievable for the average backyard mechanic. It does require removal of the forks from the bike in order to replace the oil which can be daunting for some people as it requires the brake calliper to be removed.
Another procedure that is recommended is to drill out the damper rods. This is required for the PD Valves to work properly. The stock damper rods have 2 small holes drilled in them for the fluid to be forced through and regulate the compression damping of the fork. This is a static system that works well under certain conditions but not all. The damper rods need to be drilled in two locations to 8mm, one where the current holes are and then at 90 degrees about 2 centimetres higher. This allows the fork oil to travel up the damper rods (which are now defunct) to the PD valve where a series of holes and a spring provide progressive relief of the pressure depending on the amount of force subjected to the forks.
Removal of the damper rods requires a tool (or if you are lucky you can use a rattle gun / impact driver) however sometimes the rod will spin in the fork slider when you turn the locking screw. Hence the need for a locking tool which I made with some 3mm x 30mm steel strap or you can buy the tool online for $100.
Many people online say they have just installed the kit without drilling the holes but I have been assured that it will severely reduce the effectiveness of the PD valves as the fork oil cant get thru the damper rod and into the valve unless the rod is cross drilled. In other words you are still using the stock damper rod not the PD valve to control the fork damping.
Another thing I did was slide the forks through the triple clamps for maximum ground clearance. This is not really recommended on its own as it will change the steering geometry but I countered that by also adjusting the rear shock length.
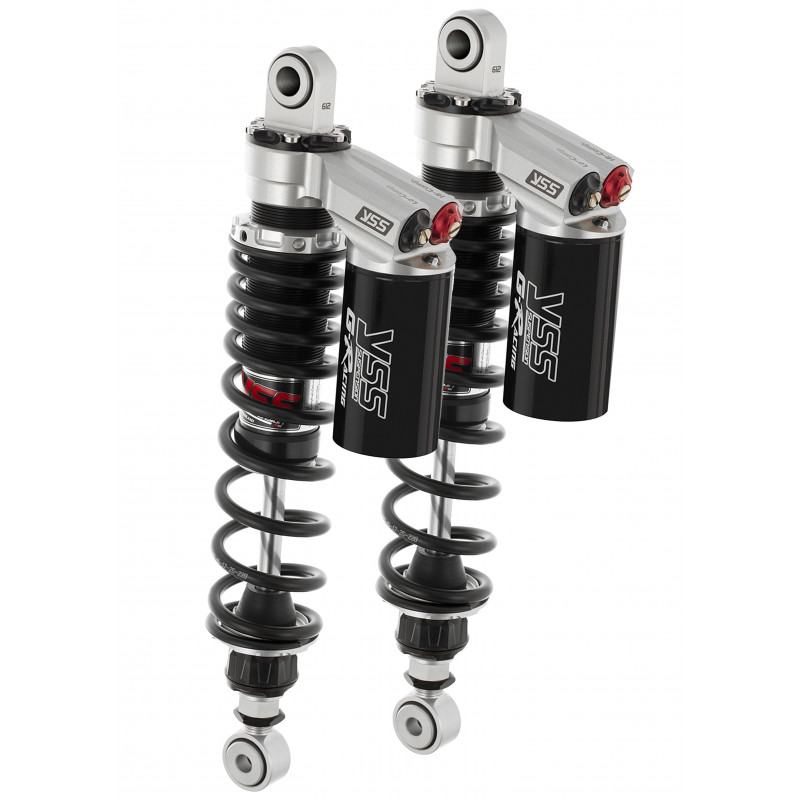
Shocks
The standard shocks are the cheapest available with only preload adjustability which is used to set the ride height depending on the weight being carried. Not having any ability to tune the shock means they will work properly in only certain conditions. Not being able to change the compression or rebound damping means you cant change the shocks set up for use on say bumpy country roads as compared to smooth highways or high speed riding compared to slow riding in traffic.
Most decent shocks will have rebound and compression damping adjustability as well as preload and length adjustment. Since I do lots of long trips on rough roads I chose the top of the line RG 362 Hi lo shocks that have both high speed and low speed compression damping. This means you can have 2 settings for compression damping. One for low speed wheel travel like dips in the road where the bike moves slowly up and down and then another high speed setting for when you hit a sharp bump and the wheel moves quickly.
Out of the box the baseline settings seem to be pretty good. I did increase preload slightly to accommodate for the luggage I was carrying. However every now and again I did get a harsh bump but nothing like the kidney jarring stock shocks that seem to bind up on the spring on sharp bumps and wallow on soft ones.
In conclusion, and after doing a 4000 KM trip in 12 days the fork upgrade made a big difference to the comfort especially on your wrists and made the bike steer better through corners. One of the guys on the ride, Don, had tried out 2 other stock Interceptors on the trip and wasn’t impressed with the front end, when he rode my bike he asked what I had done to the forks and congratulated me on the improvement and said it was a noticeable difference.
The shocks made travelling on country roads way more comfortable with less harsh jolts and less wallowing over undulations and jarring over bumps except for the occasional pothole. I still need to do a proper rider sag measurement and set the preload again without luggage and test it to see if it was lack of preload, extra weight or the high speed compression damping settings that were slightly off.
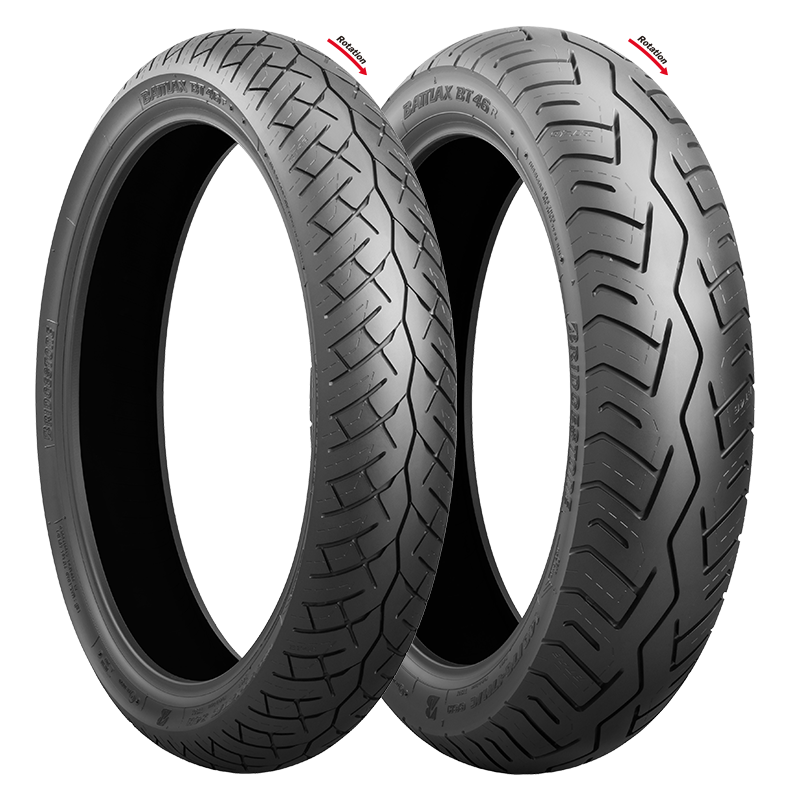
Tyres
I needed new tyres for the trip and wanted to make some changes in appearance and handling. The OEM tyres are Pirelli Phantom Sports Comp which are pretty good in the dry but many people seemed to replace them with other brands for performance reasons or to be able to change sizes. Some go for the Shinko knobbies for the scrambler look others just go up a size front and rear. Another popular choice is the Michelin Road Classic but only seem to be available in standard sizes.
One popular option seems to be the new Bridgestone BT46 Sport Touring tyre which has a revise pattern and improved wet weather handling due to a silica compound. They also have larger sizes available.
The standard front tyre is a 100/90 profile and this time I went up to a 110/90 which increased the sidewall slightly as well as the width. I was hoping to achieve a slightly softer ride by increasing the sidewall and more grip due to the extra width.
The rear tyre is normally a 130/70 and I chose a 130/80 so that there was a small increase in sidewall height for comfort and rolling circumference which would be better for highway cruising.
After a week riding in the rain on Tasmanian roads I was impressed with the performance of the tyres.
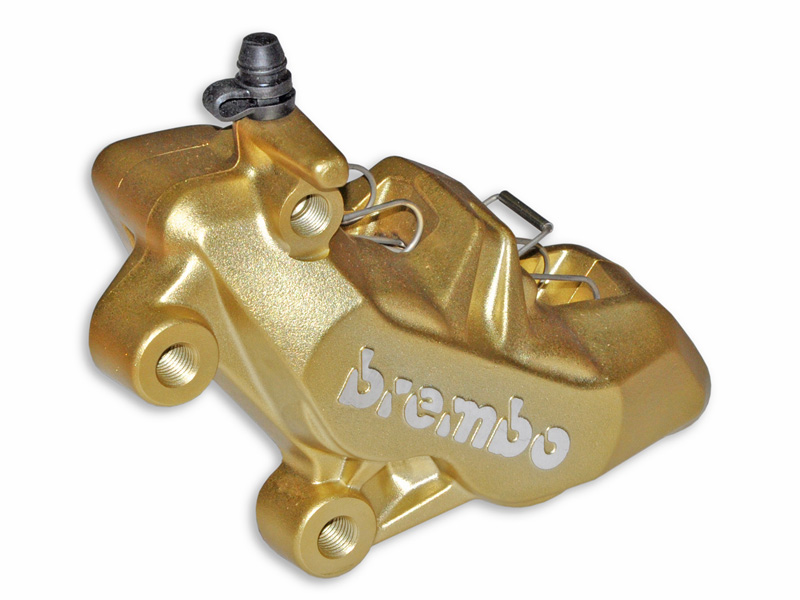
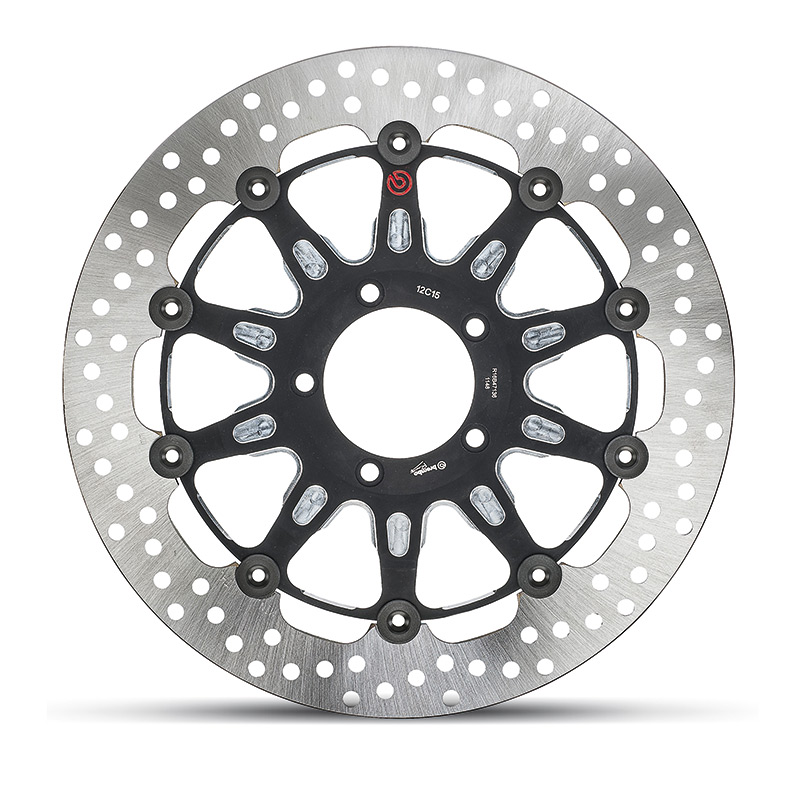
Brakes
An opportunity came up to get my hands on an adapter to upgrade the front brake to a Brembo 4 piston calliper so I decided to go ahead and do the upgrade and as it turns out it was quite beneficial after braking my right hand dirt bike riding. I found the standard front brake more like an on/off switch with very little modulation, when riding hard it is easy to get to the point of losing feel in the lever which is not confidence inspiring and on one or two occasions I have pushed the front brake to the point of the ABS cutting in. The result, apart from increased stopping power is better lever feel and modulation and less grip strength required when applying the brakes.
The kit I purchased was created by one of the members of a Royal Enfield Facebook group and consisted of a calliper adaptor, a disc spacer/adapter, an ABS ring and an ABS sensor spacer. The rest of the parts, calliper, disc, and master cylinder were purchased online.
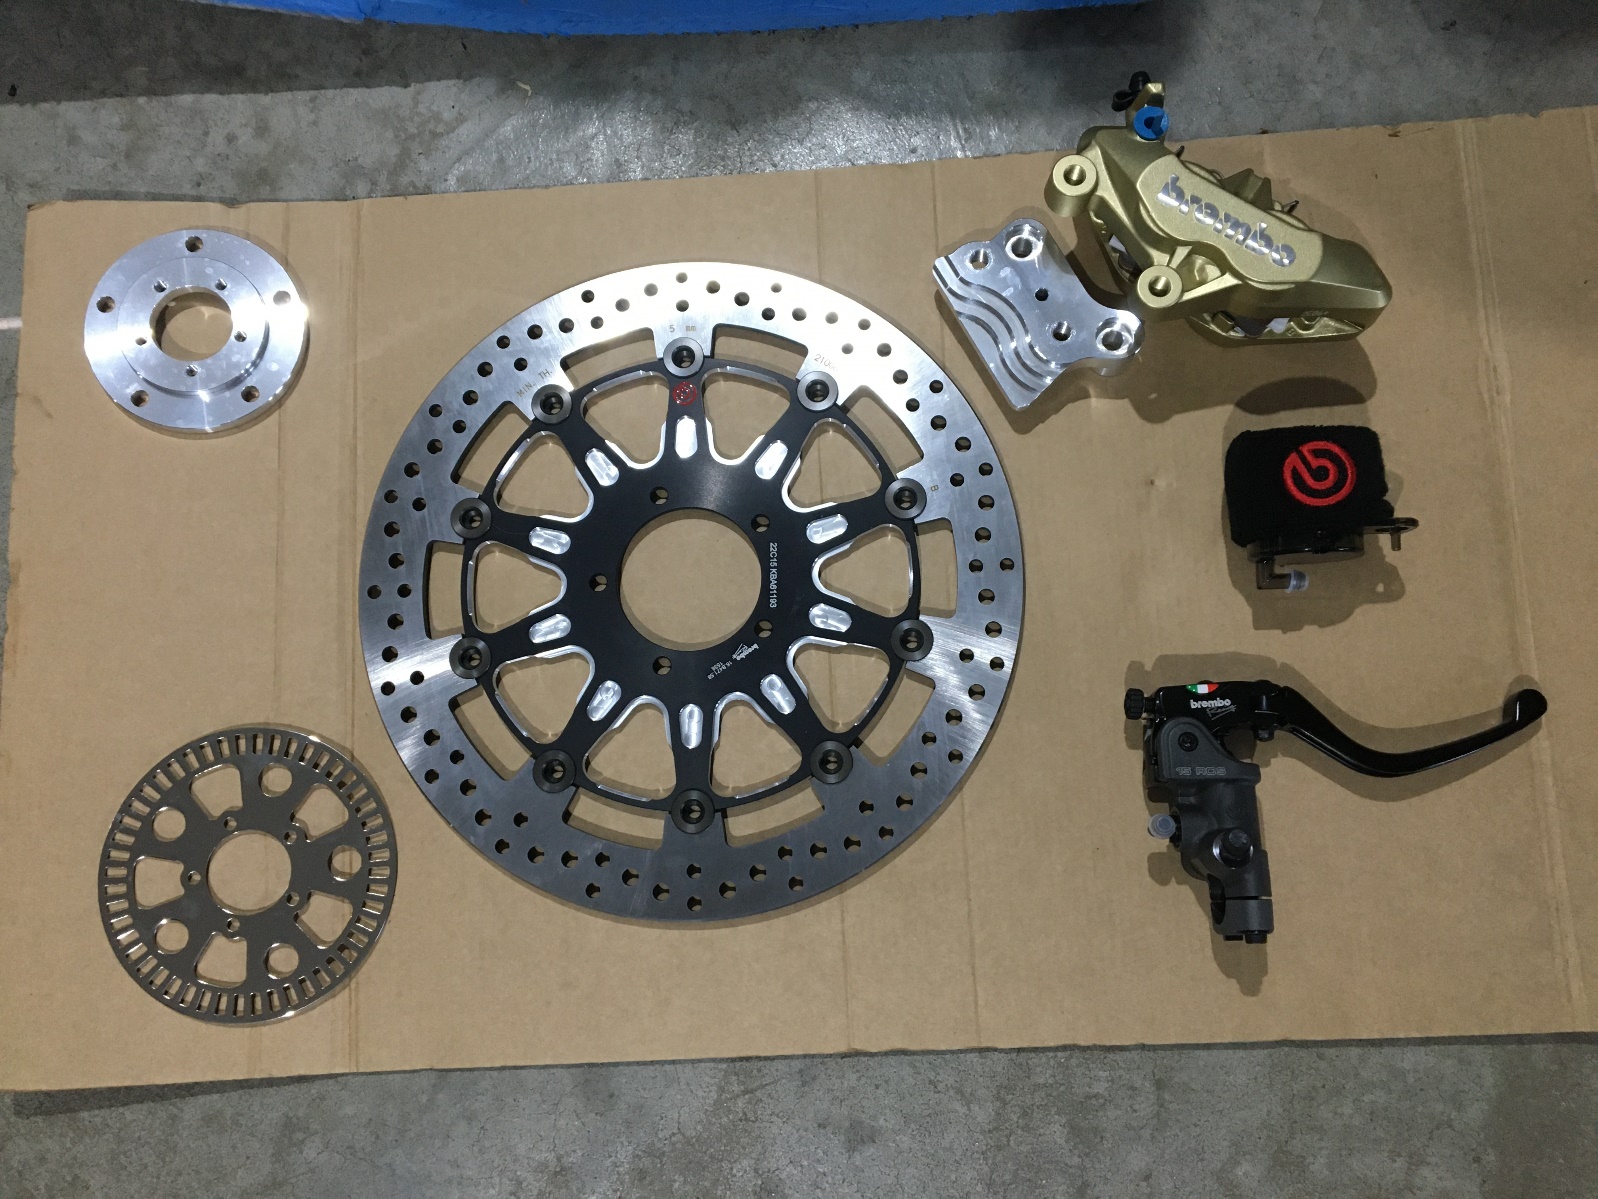
The Brembo P4 34 65mm triple bridge 4 piston 4 pad calliper has larger pad area than standard and much more braking pressure.
The Brembo Groove 330mm floating brake disc is from a Ducati Scrambler and is 10mm larger in diameter than the OEM disc
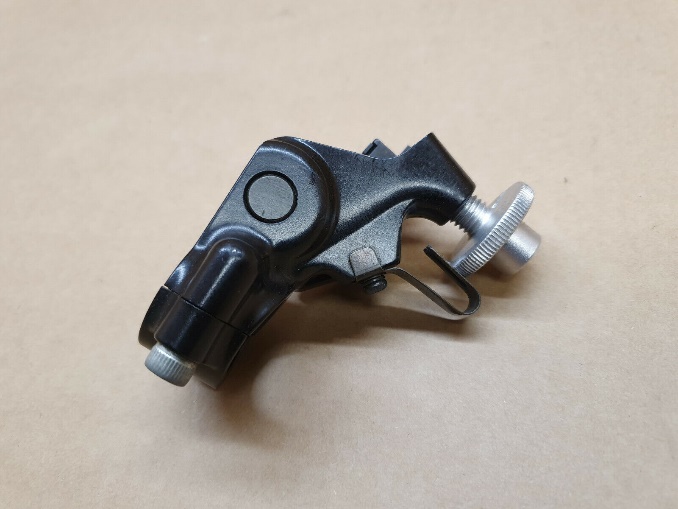
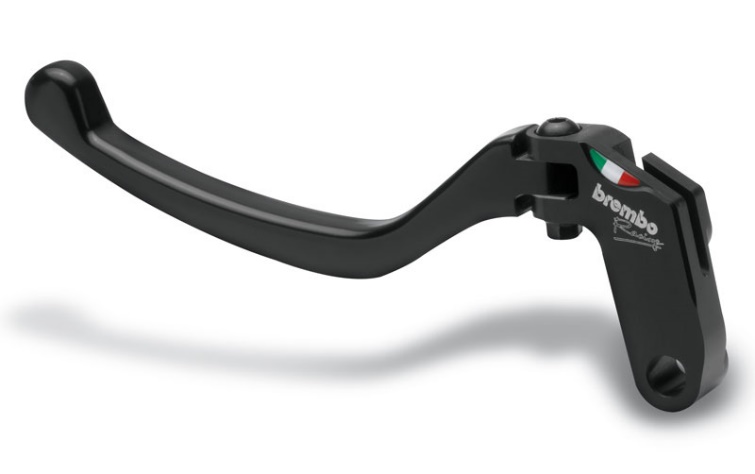
The Brembo 15RCS Radial brake master cylinder has an adjustable lever ratio and lever reach and also has a remote brake fluid reservoir.
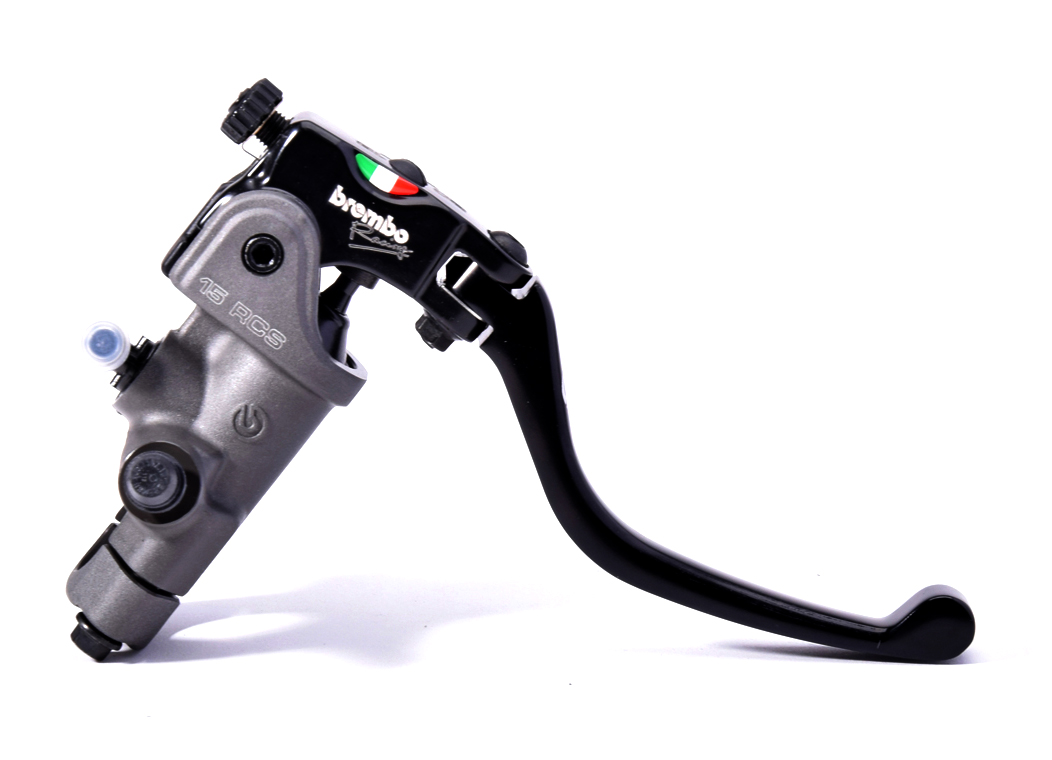
To compliment the Brembo brake master cylinder and lever I installed a Kawasaki Ninja clutch perch and fitted a Brembo Clutch lever to match the brake lever.
Seat
The standard seat is ok for around town or a short ride in the country but for long trips the Premium Touring seat is slightly more comfortable as it is has approximately 1-2 cm more padding all round. On the recent trip I did, which was about. 4000 KM over 12 days, the Premium seat was a slight improvement but still gave “numb bum” every now and again. It was ok for most of the rides except the last day where I was riding for 10 hours and had to stop more frequently. 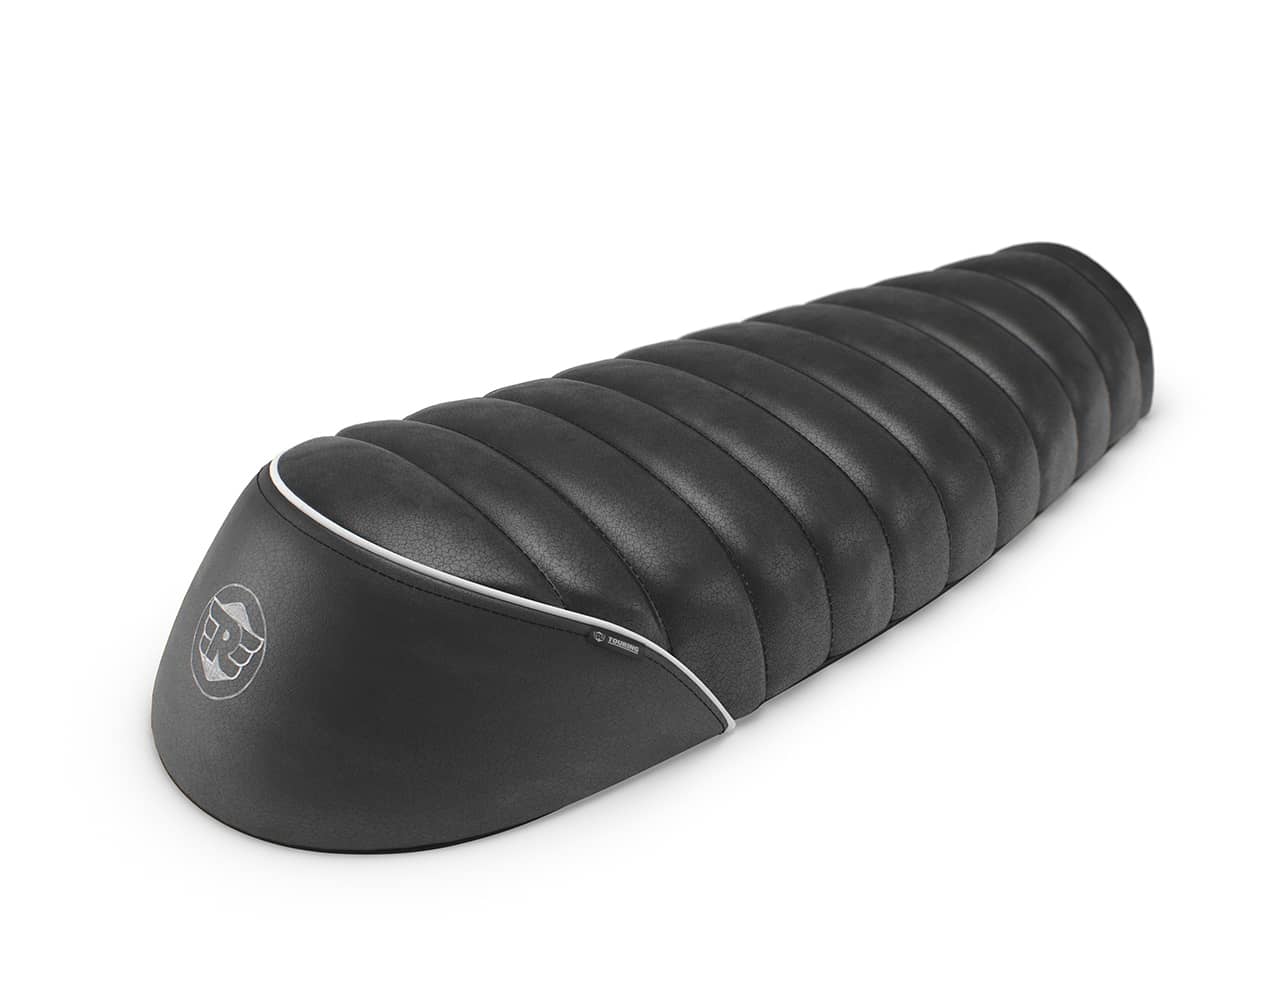
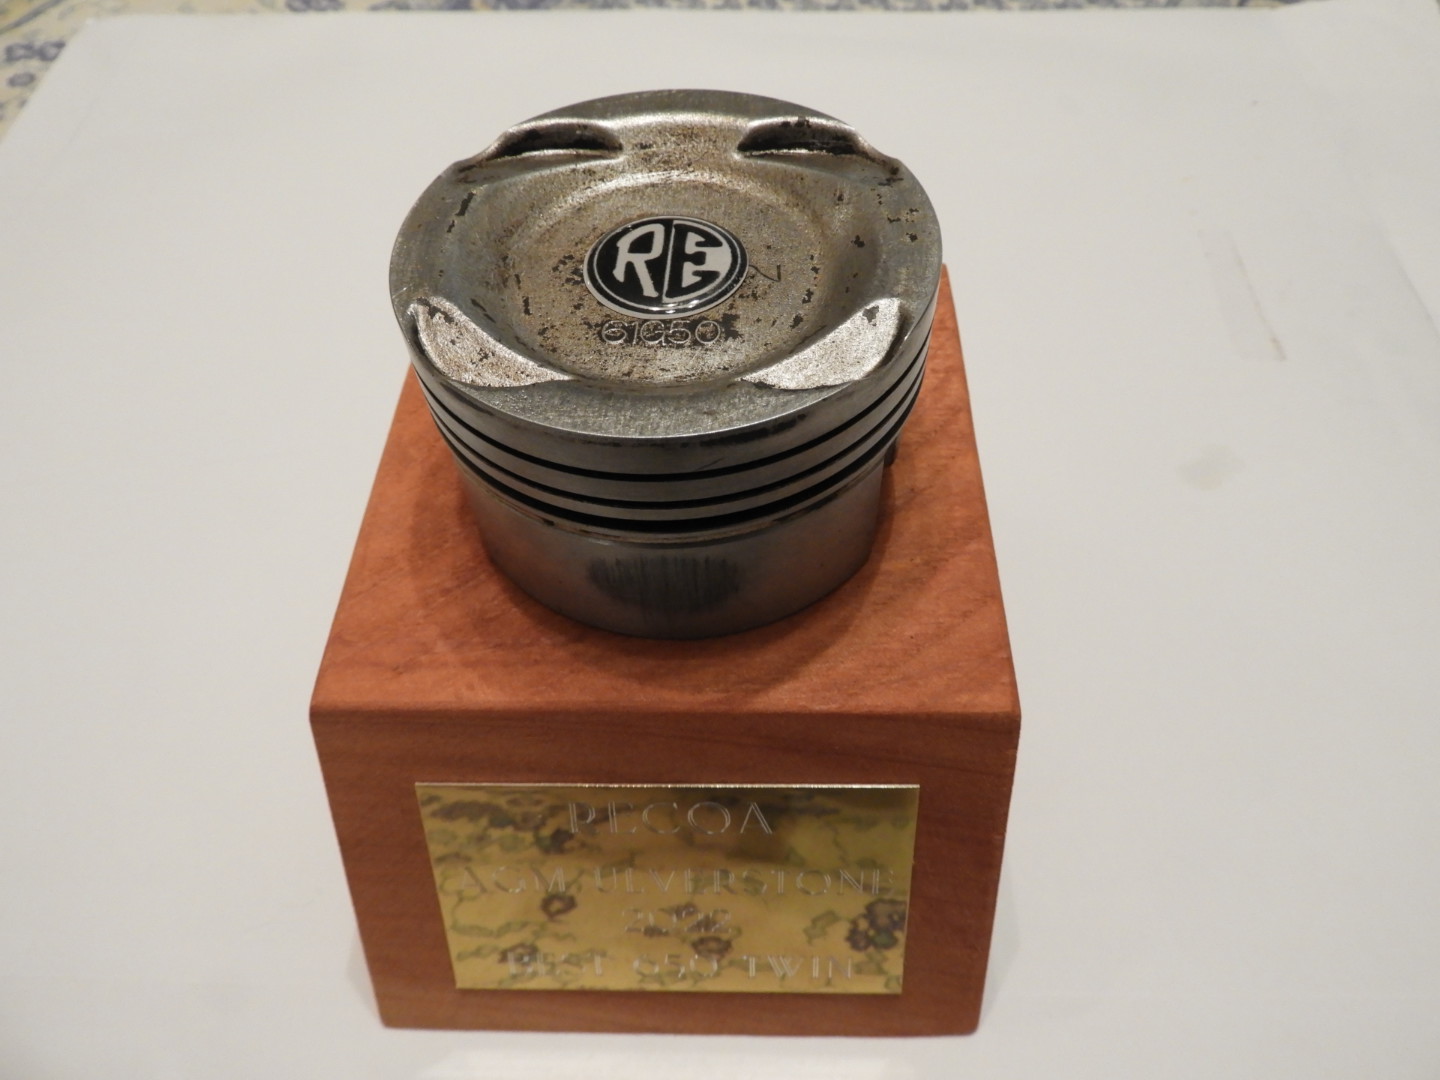
At the 2022 Royal Enfield Club of Australia AGM Rally I won the award for the Best 650 Twin
Recent Comments